


One of the biggest reasons we see users purchase Pardot is because of its native connection to the Salesforce CRM. However, we often cringe when we see Pardot users continuing to manually create lists by exporting and importing into Pardot. There are a number of segmentation features available in Pardot that can help automate processes and make tasks like this more efficient for your team
Lists
Lists: Static vs. Dynamic
There are 2 different types of list you can create in Pardot – static and dynamic. Static lists are standard lists that you’re most likely already familiar with. You can manually import and remove contacts from these types of lists. A dynamic list is populated when prospects meet a set of rules or criteria. The only way a contact can be added to this type of list is if they meet the criteria you’ve set. Dynamic lists are typically created for data subsets that often change. For example, your organizations CRM most likely holds your client database and details about them, like their industry or employee size. Setting up a dynamic list in Pardot is the most effective way to maintain an updated list of your clients.
How to set-up a static list vs. dynamic
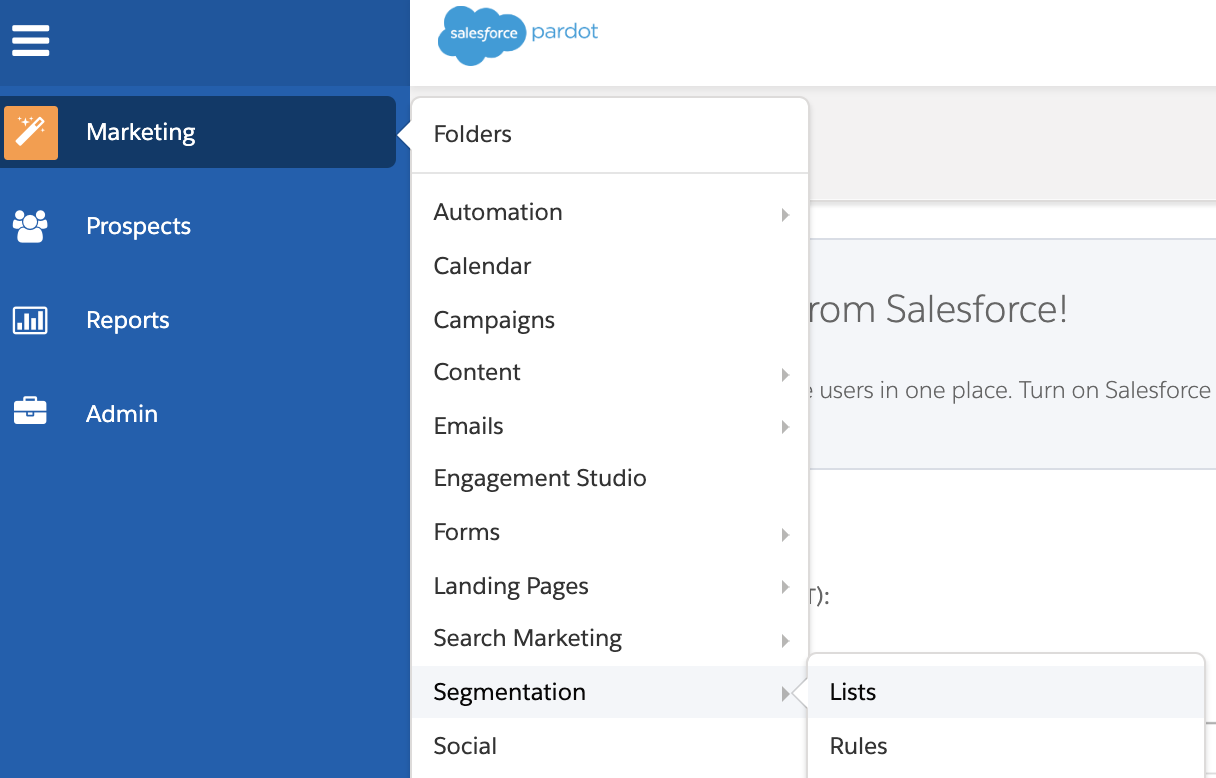
Go to Marketing > Segmentation > Lists > + Add List
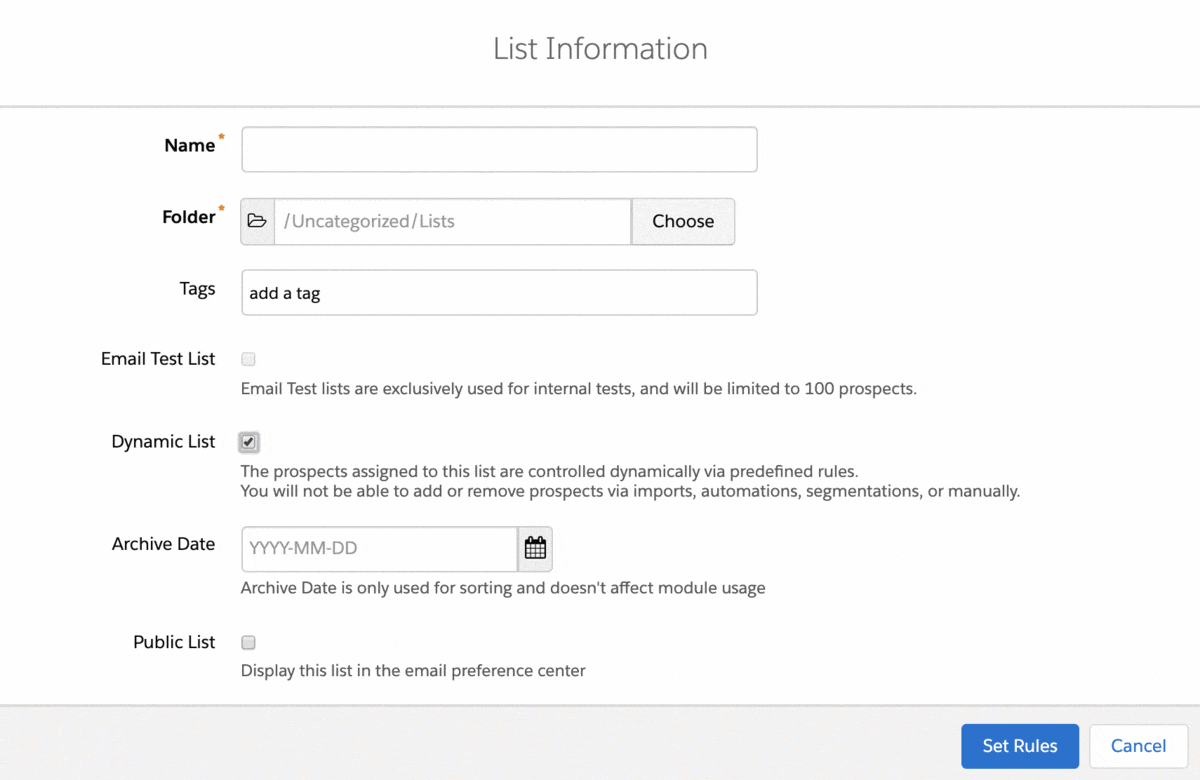
Fill out List Information:
Name: Name your list. This is for internal use only.
Folder: File your list into a folder. This is solely for organization purposes.
Tags: Tag your list! Most Pardot users don’t utilize tags for lists but they can be helpful for filtering and segmenting through different types of lists. For example, any engagement program lists could be tagged with “ep list” to easily search for it.
Email Test List: Check this box if you’d like this email to be a test and not a real email send.
Dynamic List: Leave this unchecked if you’d like to create a static lists. Check this box if you’d like to set rules and create a dynamic list instead. Notice that the blue Create List button changes to Set Rules.
Archive Date: Set an archive data if you’d like to auto delete by a certain date. This helps clean up the number of lists displayed in your lists table and prevents other users from mailing to old lists.
Public List: Check this box if this list should display in the email preference center. The email preference center allows people to opt-in and unsubscribe from specific lists versus your entire database.
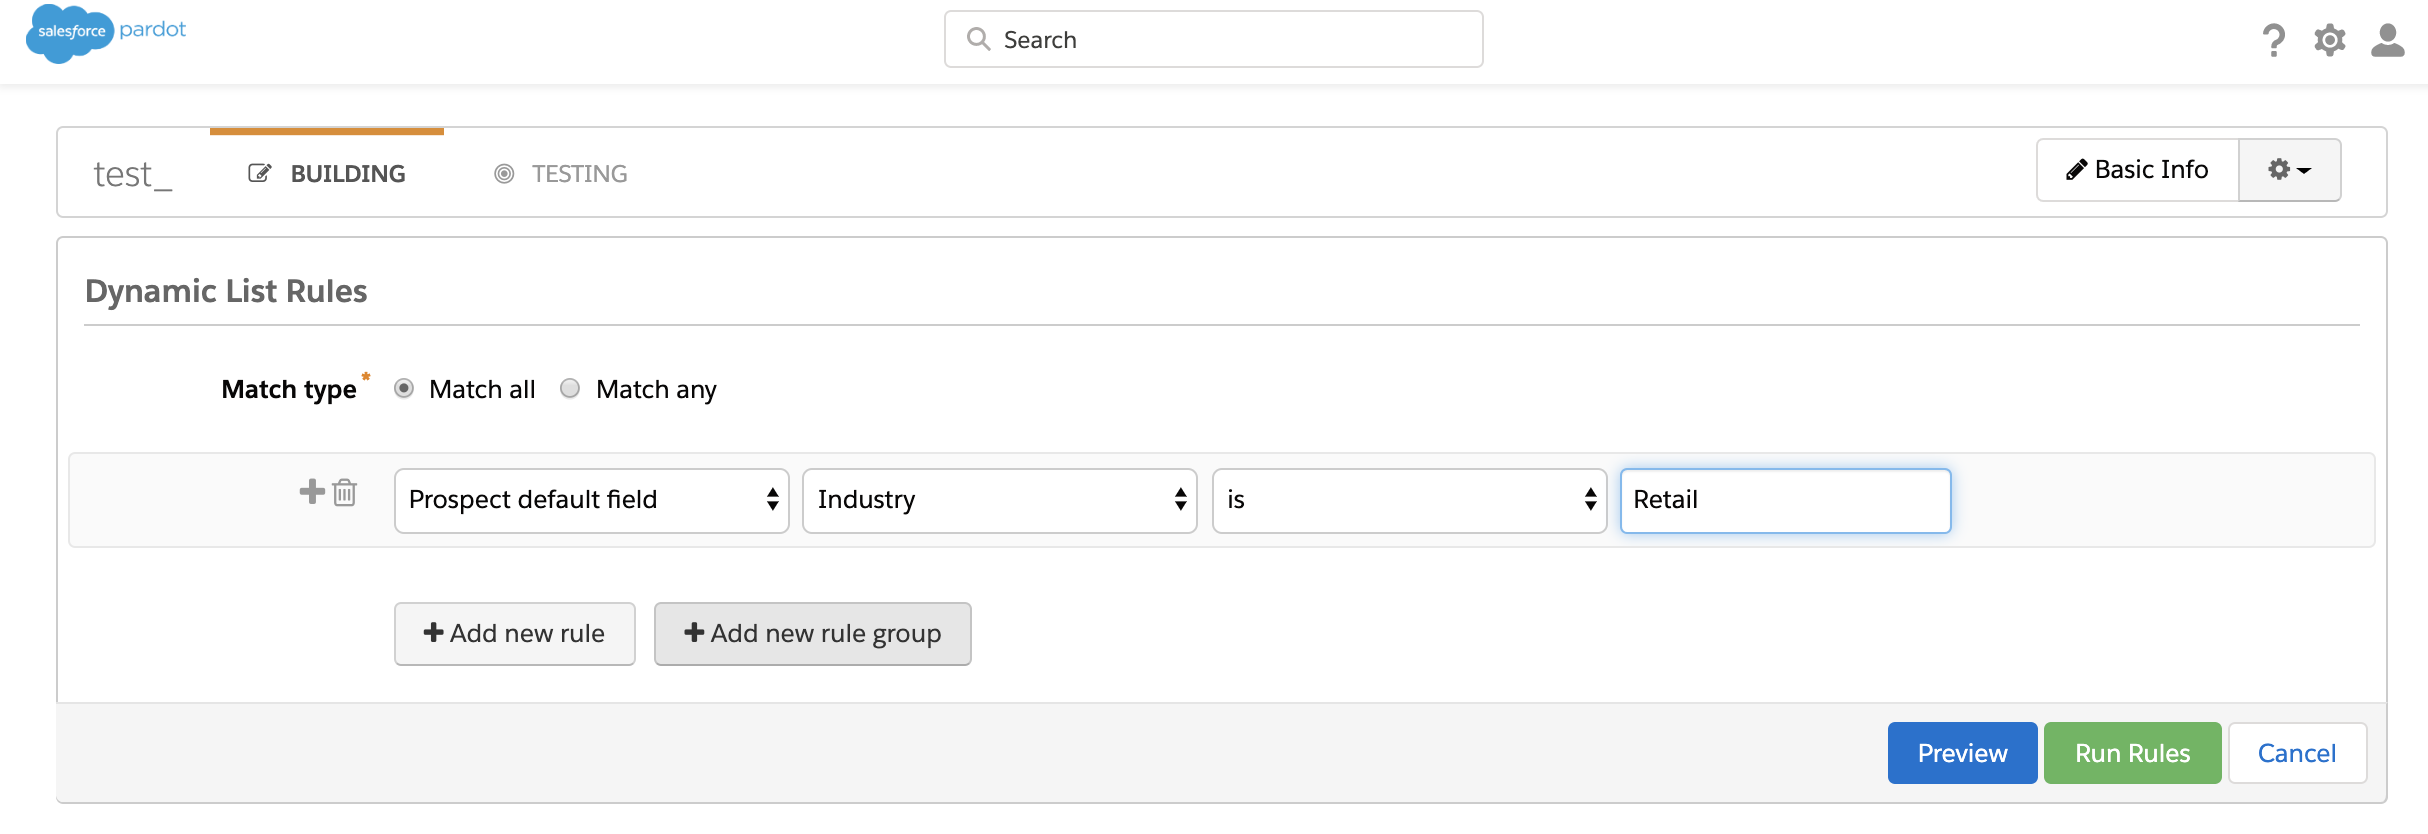
Setting dynamic list rules
Select a value from the first dropdown and then choose specific values. Once you’ve set your rules always ‘Preview’ the number of prospects your dynamic list is pulling. This will give you an idea if you are using the right criteria. Once the preview is done populating you can official ‘Run Rules’ and voilà your list is ready to use!
Note: Don’t be alarmed after you select ‘Run Rules’ and it reverts back to zero matching results after the preview. Since it was a preview Pardot will take a few minutes to repopulate.
Rules
As a Pardot user, you’ve probably heard of automation rules that retroactively pull matching data and trigger actions based on criteria you’ve set. Segmentation rules are similar to automation rules except they only evaluate matching criteria and apply actions one-time while automation rules continuously do so. Many users make the mistake of using automation rules for one-time actions then pausing them or deleting them to prevent them for running in the future. Once you run the segmentation, your applied activities will happen immediately but only once. As you can imagine, this is much easier than remember to pause or delete an automation rule.
How to set-up a segmentation rule
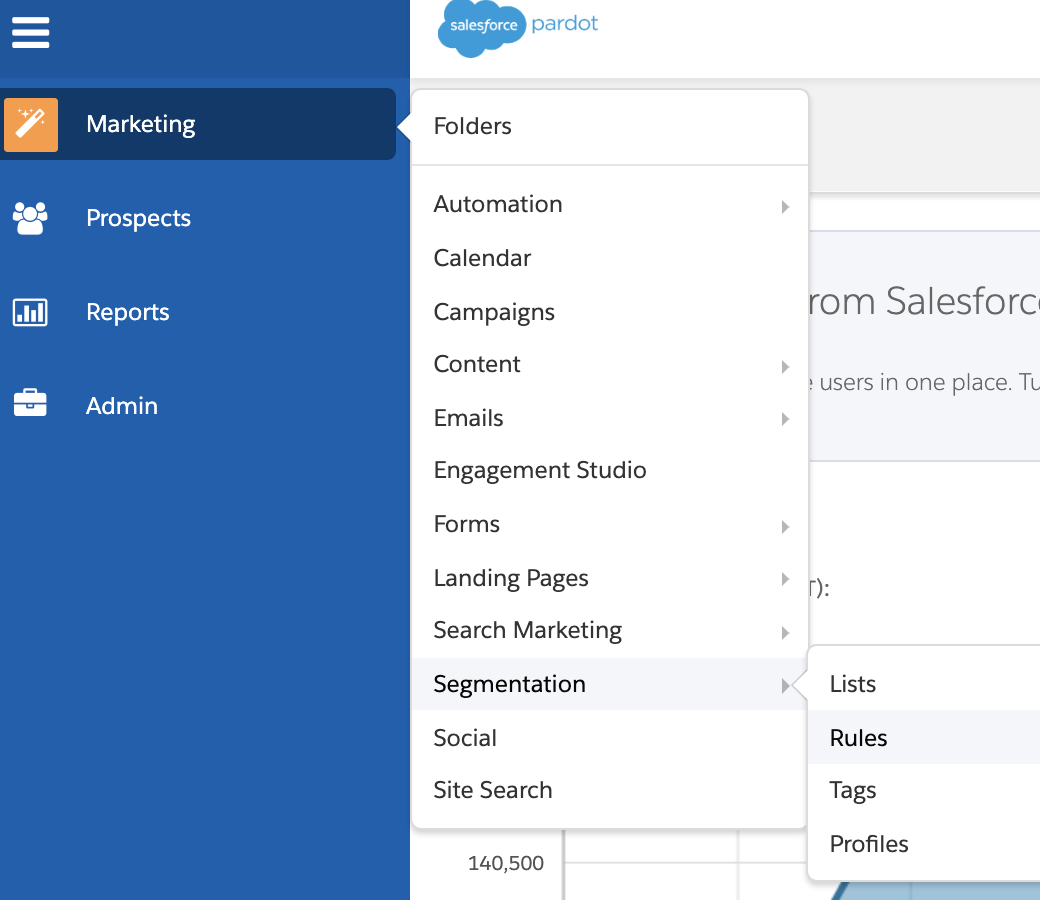
Go to Marketing > Segmentation > Rules > + Add Segmentation Rule
Select your rules and preview. To finalize your segmentation rule select ‘Run Segmentation’.
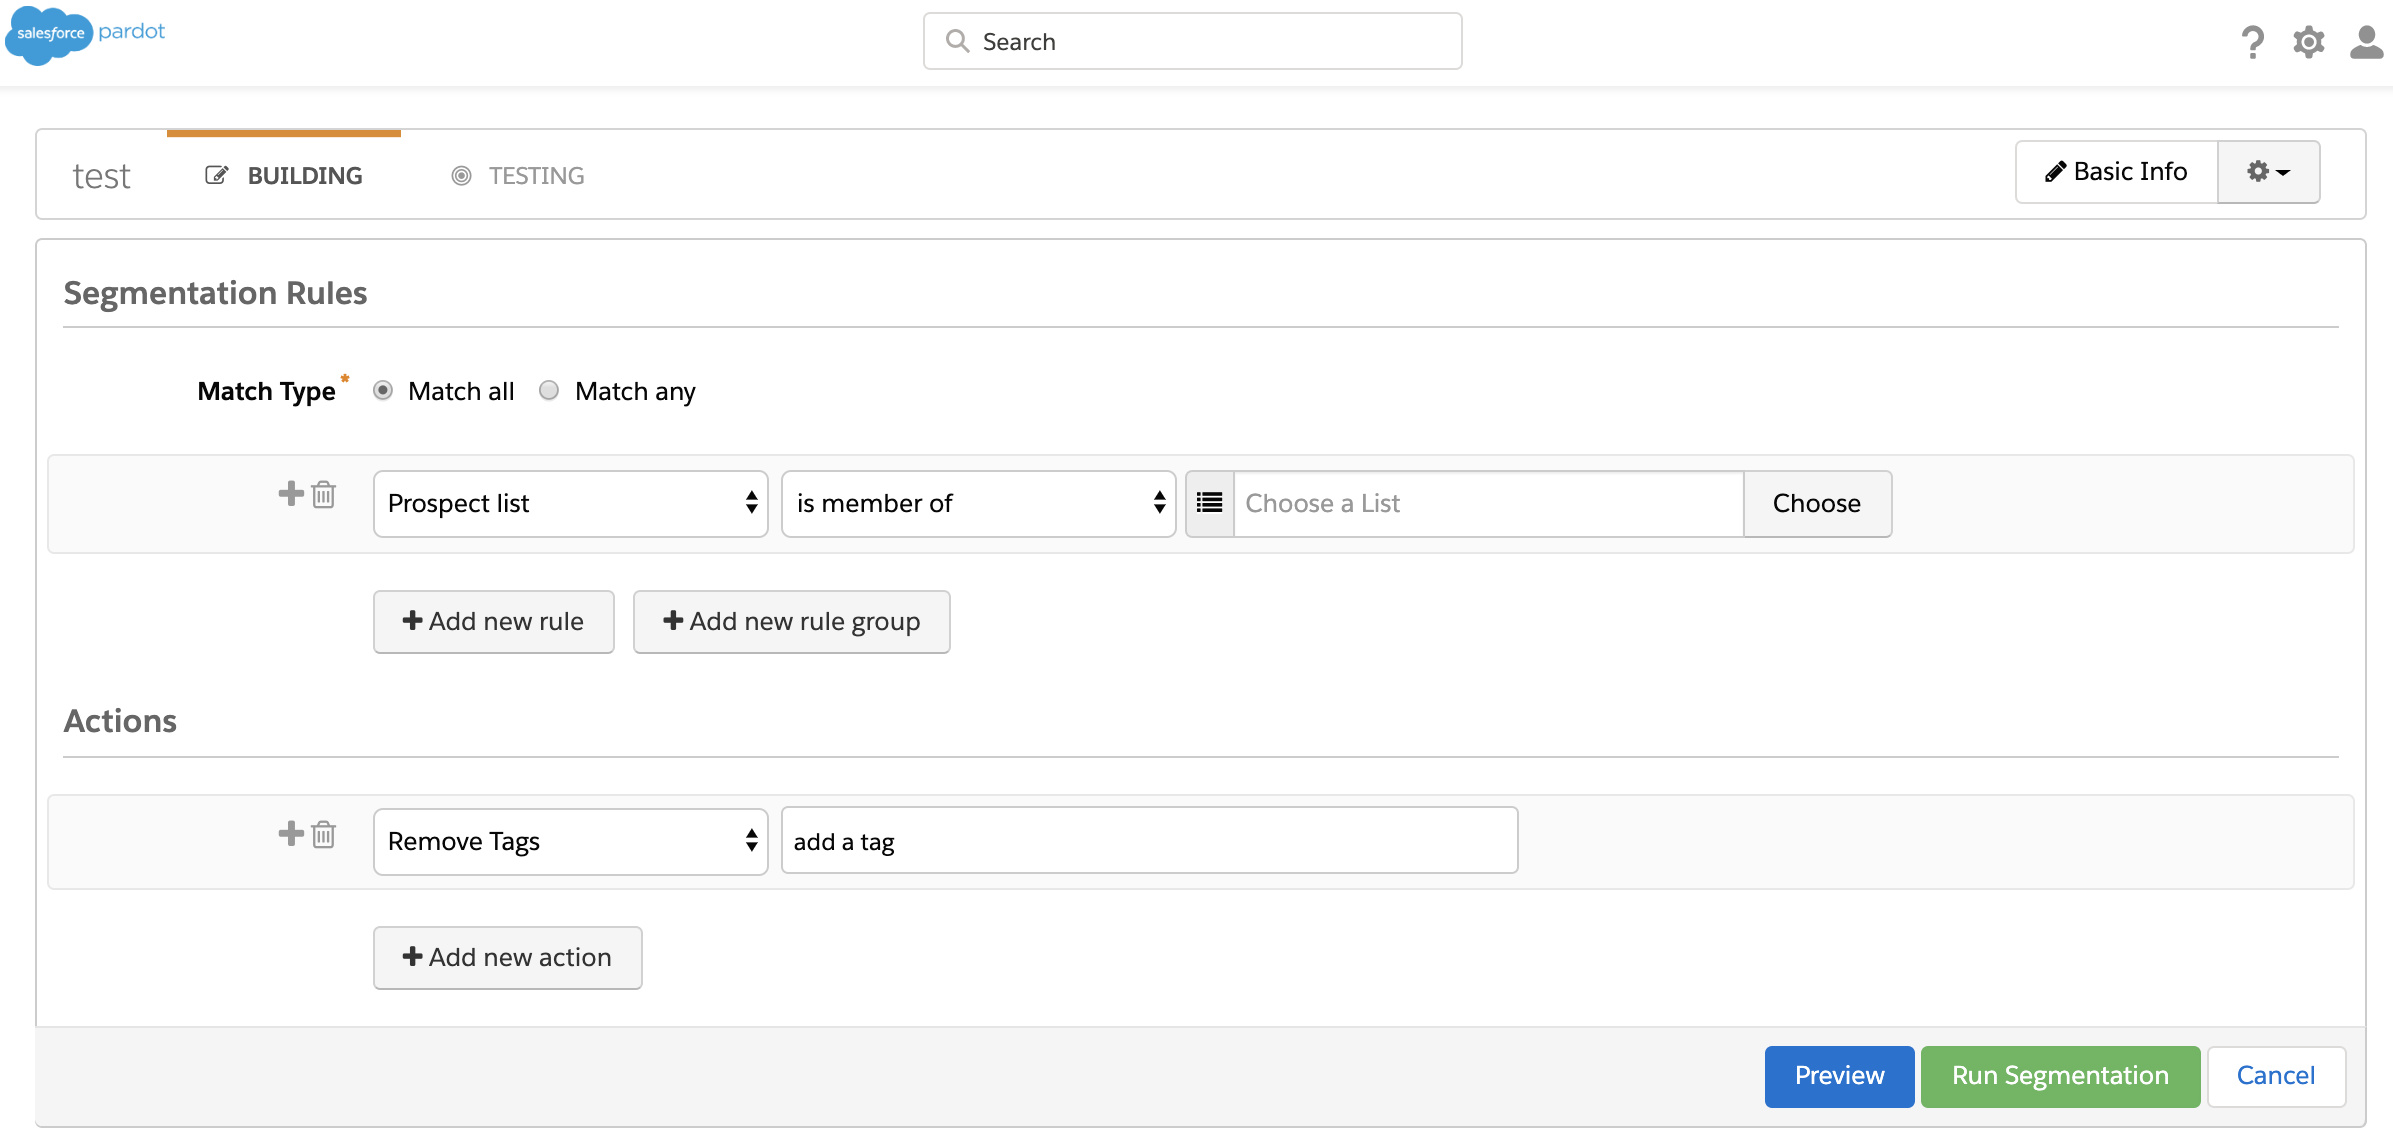
You can check the status of your segmentation rule on the overview page.

Tags
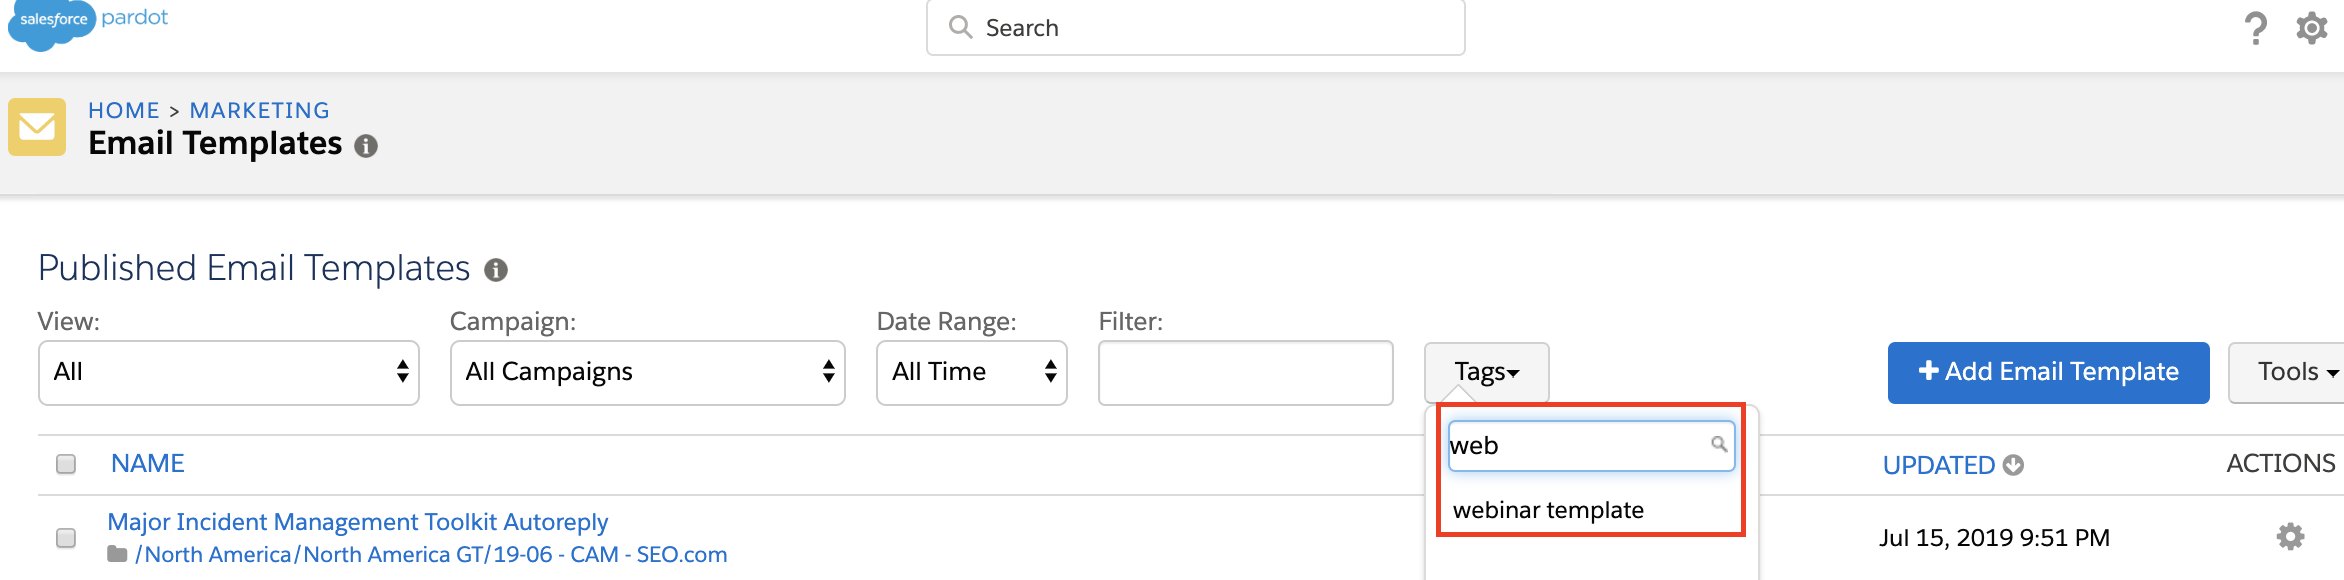
Tags are a way to organize and segment not only prospect records but also marketing assets within Pardot. This feature is usually not focused on or not used enough by Pardot users. However, if you’re a Pardot guru who has filled the software with email templates, forms, etc., you can understand the importance of organizing your assets. Instead of searching 4 pages deep for a webinar email template, tag your template with something like ‘webinar email’ for easy filtering. You can also apply tags on forms, form handlers, files, landing pages, and more!
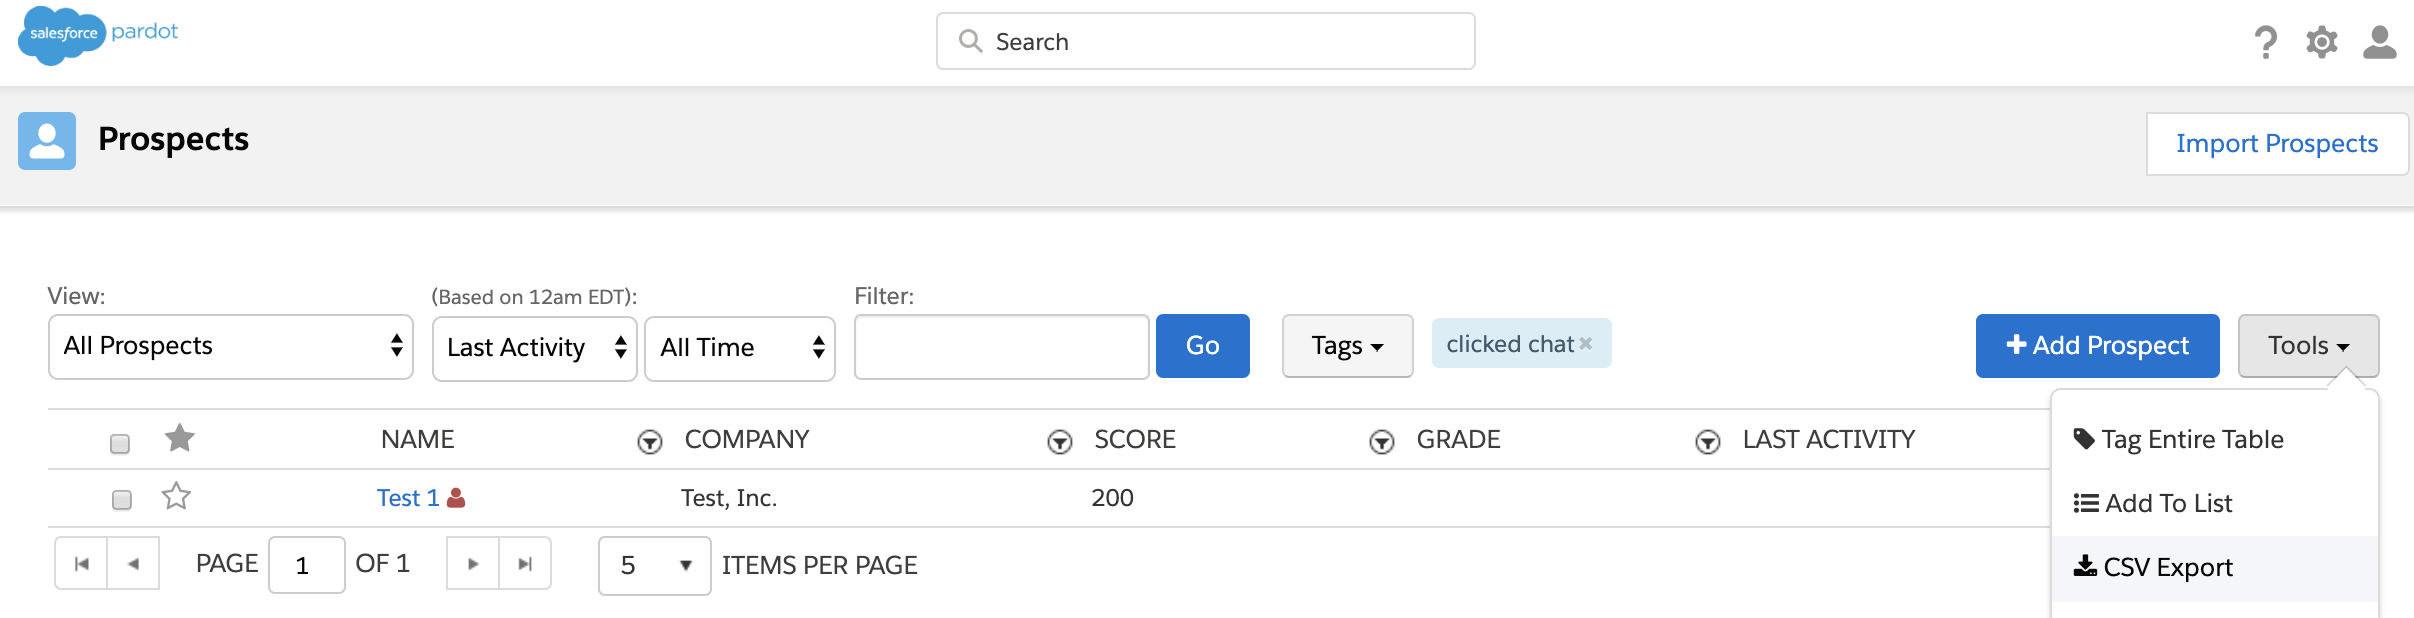
Likewise, tagging can be used for organizing your prospect database. One advantage Pardot users don’t realize is how beneficial tags can be for reports. By adding tags to prospects, you can customize filters in the prospect list view and export the data into a CSV. For example, you may have an email series that includes a custom redirect to chat with a team member and a completion action to tag them with ‘clicked chat’. Later on you could export a list of everyone who clicked on the chat and because you tagged every prospect you can now easily export a CSV using the tag filter in the prospect list view. You can also filter more than one tag allowing users to create further customized reports for export.
Here are some ways to apply tags:
1) Automation Rules
2) Segmentation Rules
3) Completion Actions
4) During Import
5) During Asset Creation & Editing Assets
6) Manually in list views
If you’re not using these segmentation tools, you’re most likely wasting time duplicating efforts when Pardot has a built-in automation for it.
If you need additional assistance with Segmentation or any other Pardot functionalities, please contact: info@netrocon.com